Table of Contents
Designing an efficient Wood Shop Layout Setup is crucial to creating a functional and safe workspace. When you set up a new shop or improve an old one, the Wood Shop Layout Setup matters. It helps boost productivity, cut down on clutter, and keep things safe.
This guide covers how to create the best woodworking space with a proper Wood Shop Layout Setup. You’ll learn tips to improve your workflow, access tools, and make your shop more efficient.
Introduction to Wood Shop Layout Setup
Importance of an Efficient Wood Shop Layout
A well-designed Wood Shop Layout Setup is vital to making your space more productive and safer. Woodworking is a rewarding yet complex craft. With the right Wood Shop Layout Setup, woodworkers can easily handle everything from basic projects to fine woodworking.
A good workshop layout saves time when looking for tools. It also makes things easier to access and cuts down on distractions and accidents.
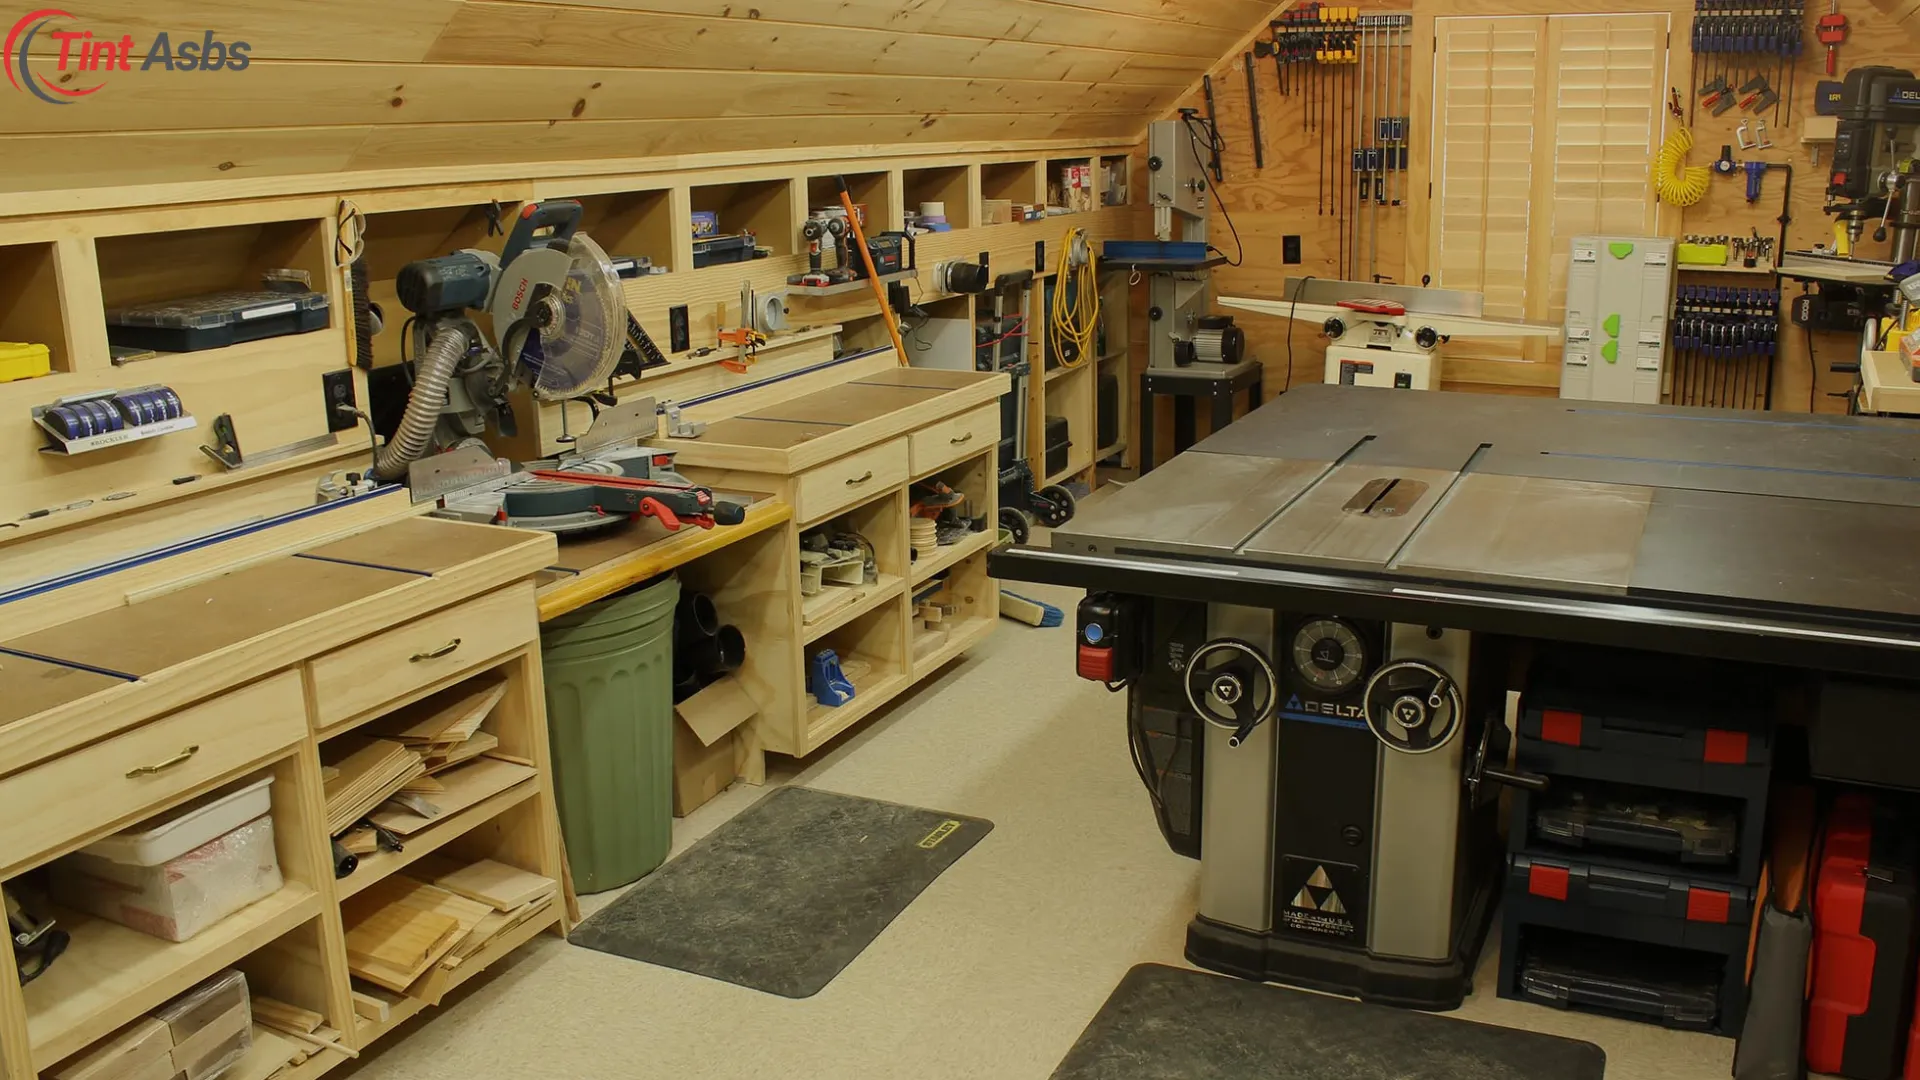
A good Wood Shop Layout Setup helps you easily access important tools. Place the table saw, router, jointer, bandsaw, and lathe where you can reach them quickly. It also makes sure dust collection systems fit well in the shop. This helps manage dust and debris, keeping the space clean and safe for woodworkers and their materials.
Key Considerations for Designing Your Wood Shop
Before starting to design your Wood Shop Layout Setup, it’s essential to understand how your workflow will function. Consider the type of woodworking you will primarily be doing. No matter if you’re working on small hand tool projects or big ones with power tools, each layout choice in your Wood Shop Layout Setup needs to fit your project needs.
Tool storage and workshop storage are other critical elements. You will need ample space for extensive tools like the mitre saw station and smaller tools like clamps, router bits, and saw blades.
Setting aside spots for key tools and safety gear, such as safety glasses and ear protection, keeps you organized. This way, you’re always ready for any task with an efficient Wood Shop Layout Setup.
Also Read: Miramar Business Awards 2025: Why You Must Enter to Lead
Planning Your Wood Shop Layout
Understanding Workflow in a Wood Shop
A wood shop layout setting should be designed around your workflow. From material storage to final assembly, the layout should encourage a logical movement of materials and tools. Start by considering the steps involved in your typical project. Fine woodworking usually starts with cutting. Then, it moves to shaping, assembly, finishing, and cleanup.
The ideal shop layout minimizes unnecessary movement. For instance, your router table should be placed near your table saw so you don’t need to walk across the entire shop floor to access tools. Position the outfeed table where you can easily cut and handle lumber. Also, place your dust collection system in the center to serve multiple machines.
Space Management and Organization
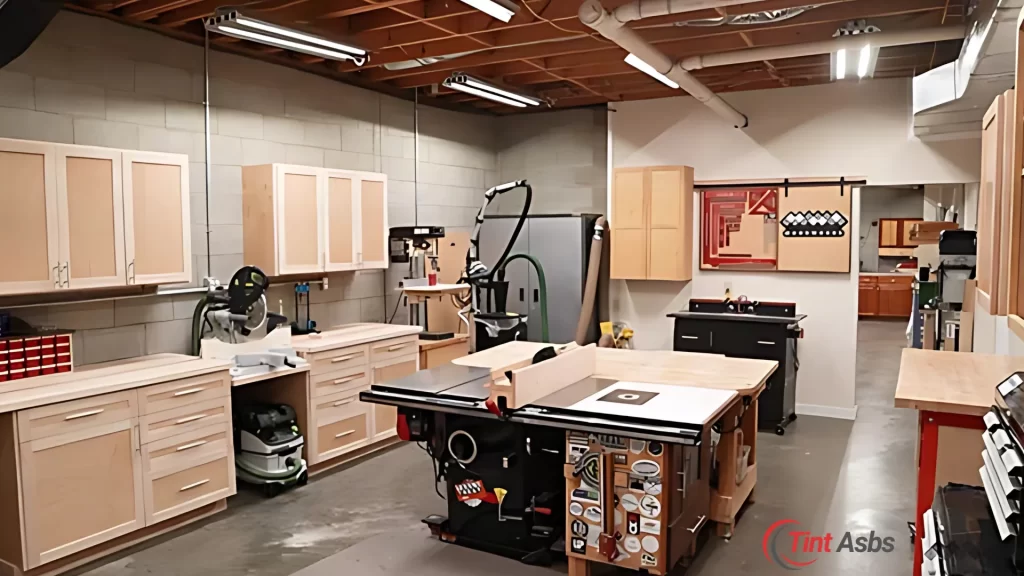
One key component of an efficient woodworking shop layout is space management. Maximizing space is key, whether you’re setting up a Wood Shop Layout Setup in a two-car garage or transforming your basement shop.
Use wall-mounted pegboards and tool cabinets for small tools and hand tools like clamps, screwdrivers, and drills. Consider a lumber rack for storing pieces of lumber vertically for large items.
You can also create zones based on tasks. For instance, keep your cutting area away from the finishing zone to prevent dust and debris contaminating your next project. Tools used together should be placed near each other to ensure an uninterrupted workflow in your Wood Shop Layout Setup.
Zoning for Specific Tasks and Tools
Zoning your shop space is another essential element of your woodshop layout. Each task requires a specific type of tool, so grouping these tools by their function will improve workflow and efficiency.
- Cutting Zone: This area should house tools like the table saw, bandsaw, sliding mitre saw, and router. Make sure there’s ample space around these tools for moving and cutting pieces of wood.
- Assembly Zone: The workbench or router table will be central here, with easy access to tools and jigs for precise assembly.
- Finishing Zone: This zone should be clean, with adequate ventilation and proper lighting, so you can apply finishes without worrying about dust settling on your work.
Essential Elements of a Wood Shop Layout
Tool Placement and Access
The placement of hand and power tools is one of the most critical aspects of your woodshop layout. Each tool should be placed where it’s used most frequently and in the most accessible locations. Place power tools like the lathe, planer, and jointer in spacious areas. Ensure there’s enough room around the table saw and mitre saw for larger pieces of wood.
Consider using tool chests, cabinets, or a clamp rack to organize tools in a way that allows for easy access. Full access to tools is crucial for maintaining workflow, whether you’re in a small shop or a new shop.
Workbench and Assembly Areas
Your workbench needs to be big enough for many tasks. This includes joinery, sanding, and finishing. It doesn’t matter if it’s in a garage or a basement workshop. Enough space around the workbench ensures you can handle pieces of wood without obstruction.
Additionally, ensure that workshop storage is nearby so that tools and materials are within arm’s reach. An outfeed table or a router table should be placed near the workbench to streamline the transition from cutting to assembly.
Also Read: Roseville Short Term Rentals Business License: Unlock Profit
Safety Zones and Clearances
Safety should always be a priority in any woodworking environment. A good woodshop layout includes safety zones that allow for easy access to emergency exits, fire safety equipment, and first aid kits. Ensure there’s plenty of space around the table saw and other heavy-duty tools for safe operation.
Safety should also extend to proper tool storage. Store tools properly. Use dust collection systems to reduce risks from airborne particles. Additionally, make sure there are clear pathways to avoid tripping hazards, especially in a small shop.
Ventilation and Lighting Considerations
Adequate ventilation and lighting are essential in any woodworking shop layout. Dust collection systems cut down harmful sawdust in the air. This also lowers the chances of making mistakes. Consider task lighting for the workbench and router table and general lighting for the overall space.
Good shop air quality is crucial, especially if power tools create dust. Installing an efficient dust collector will help maintain a clean and safe environment. Shop air filtration systems can also be used to filter the air of fine particles that linger after the sawdust has settled.
Creating Work Zones for Efficiency
Cutting Zone Setup
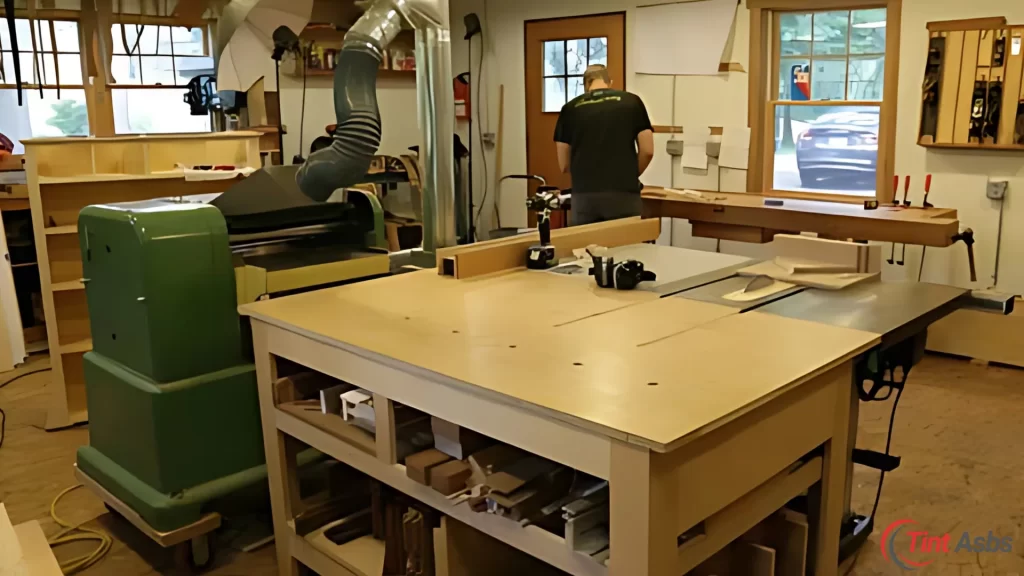
The cutting zone is one of the busiest areas in any woodworking shop layout setting. Here, you’ll be handling lumber, plywood, and woodworking tools like the bandsaw, table saw, and sliding mitre saw. Ensure that there’s sufficient space around the table saw and outfeed table to move materials safely.
Sanding and Finishing Area Layout
For sanding and finishing, you’ll want a clean, well-ventilated area that minimizes the risk of dust contamination. The sanding zone should be located away from the cutting area, as the dust generated during sanding can damage finished pieces.
Think about a basement or garage workshop. Make sure it has windows for airflow. Position your dust collection system to catch airborne particles during work.
Storage for Materials and Tools
Storage for lumber, tools, and essential tools is crucial in any woodworking shop layout. A lumber rack helps store your lumber. A tool chest or pegboard works for smaller items. This keeps your space tidy and free of clutter. Organize your tools based on frequency of use and type of woodworking you’re doing.
Also Read: The Business Sherpas: Your Strategic Pathway to Success
Optimizing Wood Shop Space
Maximizing Vertical Space for Tool Storage
In a small shop, it’s essential to maximize vertical space. Use pegboards, wall-mounted tool cabinets, and overhead storage for items you don’t use as frequently. This will free up workspace and help keep your shop floor organized.
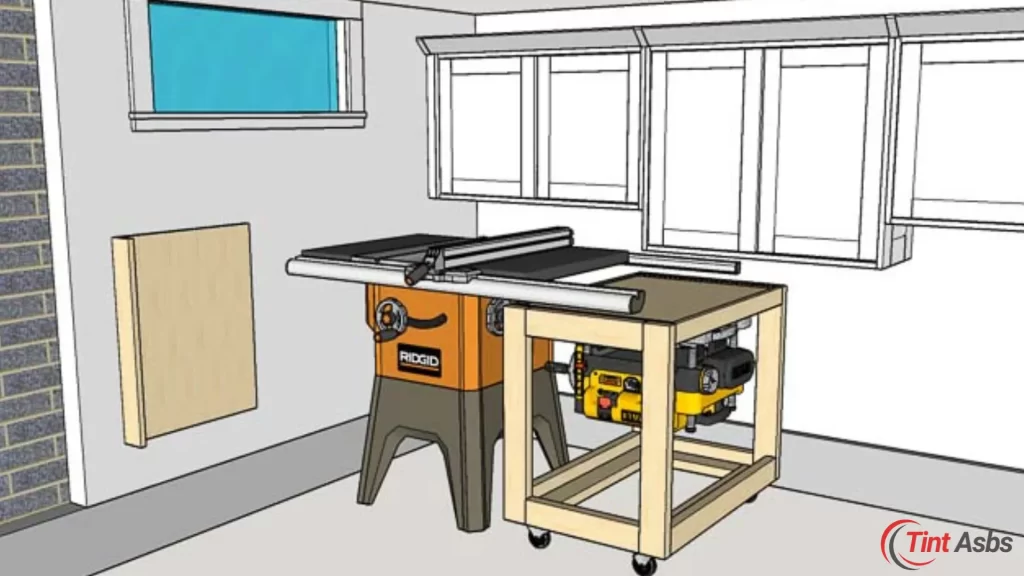
Using Mobile Tool Carts for Flexibility
Mobile tool carts are excellent for adding flexibility to your shop design. These carts can be moved to different work zones as needed, allowing you to bring tools to the task rather than walking to each station.
Creating Multi-Purpose Work Surfaces
Consider creating multi-purpose work surfaces in a small shop or garage workshop that can serve different tasks. For example, a workbench that doubles as a sanding or assembly station can save you precious space while offering versatility.
Safety Features in Wood Shop Layout
Emergency Access and Exits
Ensure that emergency exits are clearly marked and easily accessible in case of an accident. The path leading to these exits should be free of obstacles, and all tools should be stored safely when not in use.
Fire Safety and Hazard Control
A fire safety plan is essential since woodworking involves using power tools and flammable materials. Keep fire extinguishers close and easy to reach. Also, maintain your dust collection system regularly to avoid fire hazards.
Proper Tool and Equipment Handling Areas
Designate specific tool storage areas for hand and power tools, ensuring they are always kept in their proper places. Using power tools like lathes and jointers safely makes woodworking better and safer.
A good woodshop layout is key for a safe and efficient woodworking space. A good layout helps. Proper tool placement matters. Safety measures are key. An organized workspace creates a perfect environment for any project.
This applies to both small DIY tasks and large, fine woodworking jobs. Focusing on workflow, tool access, and safety will make your wood shop better. This way, you can work more efficiently and safely, leading to successful projects.